Renovations are exciting. Whether you’re opening up a floor plan, replacing aging materials, or modernizing a property for better efficiency, construction signals progress. But behind the drywall dust and power tools, there’s a vulnerable system quietly at risk: your HVAC.
Heating and cooling systems are designed for controlled environments. Renovations, on the other hand, create chaos—dust, vibration, airflow disruptions, exposed wiring, structural shifts, and debris. Even small projects can introduce contaminants into ductwork or damage sensitive components. Larger remodels can throw off airflow balance entirely.
Protecting your HVAC system during renovations isn’t just about avoiding repair costs. It’s about preserving indoor air quality, maintaining energy efficiency, and preventing long-term mechanical strain. The steps you take before and during construction will determine whether your system keeps running smoothly—or becomes an expensive afterthought.
Below is a comprehensive guide to doing it right.
Inspect and Document Your HVAC System Before Work Begins
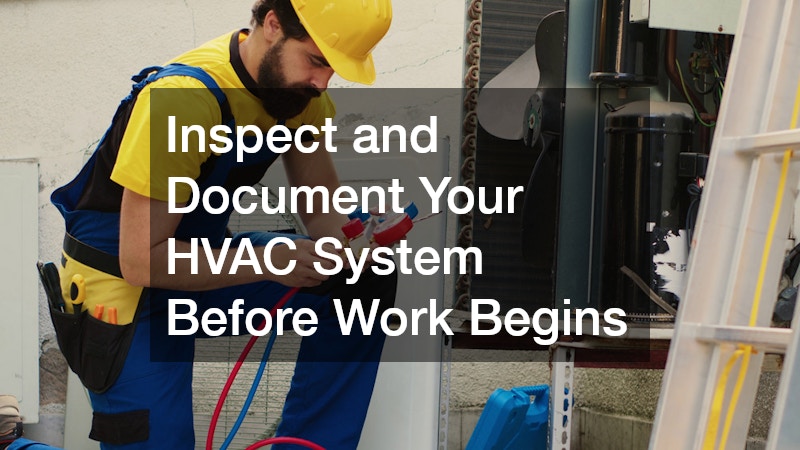
Before the first wall is opened or tool is powered on, pause and evaluate your current HVAC condition. Renovations complicate liability. If something stops working midway through a project, you’ll want clear documentation of its prior state.
This isn’t about assuming something will go wrong. It’s about removing ambiguity. Construction sites are busy environments with multiple trades moving quickly. If airflow weakens or the system starts short-cycling during the project, you need to know whether that issue existed beforehand or developed during renovation.
A clear mechanical baseline gives you confidence—and leverage if needed.
Schedule a Comprehensive Professional Inspection
Start with a professional inspection. Have a technician examine:
- The air handler and blower motor
- Refrigerant lines and insulation
- Electrical connections
- Ductwork in attics or crawlspaces
- Outdoor condenser condition
Ask the technician to go beyond a quick visual check. This is the time to identify small concerns that could worsen under construction stress. For example:
- Slightly worn insulation around refrigerant lines can tear easily during framing work.
- Minor duct sagging in an attic may become worse if workers step near it.
- A blower motor already accumulating dust will struggle even more during renovation.
If possible, request performance readings during this visit. Knowing the system’s temperature split (the difference between return and supply air) provides a valuable reference point later.
This inspection also allows you to address small maintenance issues before renovation begins. It’s far easier to replace a weak capacitor or secure loose wiring before crews are working around the equipment.
Document Everything Visually
Take timestamped photos of visible components. Focus on areas most likely to be affected:
- Condenser coil condition
- Line set routing
- Attic duct connections
- Vent terminations at the roofline
- Thermostat wiring
Photographs serve two purposes. First, they help you remember exactly how everything looked before walls were opened. Second, they eliminate guesswork if a dispute arises.
If you’re working with a local builder, ask them to walk through the property and identify areas where mechanical systems intersect with construction zones. This might include:
- Framing adjustments near duct chases
- Wall removal around return air paths
- Flooring changes that affect vent placement
That shared understanding prevents confusion later. When everyone sees where the HVAC components run, they’re less likely to accidentally cut into or compress them.
Coordinate Early When Roof Access Is Involved
If roof access will be required, coordinate early with the roofing contractor. Vents, flues, and exhaust terminations can be bumped, shifted, or temporarily removed during work. Even minor displacement can lead to leaks or airflow inefficiencies.
Ask specific questions before work begins:
- Will any vent stacks be removed or temporarily capped?
- How will penetrations be protected during tear-off?
- Who is responsible for verifying proper reinstallation?
Even a small shift in an exhaust vent can affect draft performance. Improper sealing around penetrations may introduce moisture that damages insulation or nearby ductwork.
Clear coordination here prevents callbacks later when ceilings are already closed.
Build an Accountability Checklist You Can Reference
Create a simple accountability checklist:
- System performance baseline (temperature differential)
- Static pressure reading if available
- Filter condition
- Thermostat functionality
Keep this checklist accessible throughout the project. If a room suddenly feels warmer or airflow seems weaker, revisit your baseline numbers.
For example:
- If the temperature differential drops significantly, dust buildup or duct disconnection could be the cause.
- If static pressure increases, something may be blocking airflow.
- If thermostat programming resets, wiring may have been disturbed.
The goal isn’t to micromanage the construction process—it’s to have objective reference points.
Protecting Your Future Self From Uncertainty
Think of this stage as protecting your future self. If something changes, you’ll know whether it was aging equipment—or construction impact.
Without documentation, even honest contractors may struggle to determine responsibility. With documentation, conversations become straightforward. You have proof of system condition, performance, and configuration before renovation began.
That clarity reduces stress, prevents finger-pointing, and ensures your HVAC system remains an asset—not an afterthought—throughout the renovation process.
Seal and Isolate Ductwork to Prevent Contamination
Renovation dust is relentless. It floats, settles, and infiltrates places you didn’t think possible. Once it enters ductwork, it can circulate for months.
The goal here is containment.
Seal all supply and return vents with plastic sheeting secured tightly with painter’s tape. This should be done before demolition begins. If duct sections are being modified or temporarily disconnected during roof repairs, ensure open ends are capped immediately.
In homes near landscaping projects or areas with heavy organic debris—such as properties adjacent to tree nurseries—airborne particles can increase significantly when exterior work overlaps with interior renovations. Fine pollen and soil dust combine with drywall debris to create a perfect storm inside duct systems.
Consider isolating work zones using temporary plastic barriers. If only part of the home is under renovation, keep HVAC airflow restricted away from active construction areas.
After work concludes, schedule a duct inspection. Even well-sealed systems can experience minor contamination, and it’s far easier to address it immediately than months later when airflow problems surface.
Protect Outdoor Units From Construction Debris
Outdoor condensers are surprisingly easy to damage during renovations. They sit exposed, often near work zones, and are vulnerable to falling debris, nails, sawdust, and foot traffic.
If you’re adding hardscaping or outdoor features, coordinate placement carefully. A patio installer might temporarily stack materials near the unit without realizing the airflow clearance requirements. Condensers need at least two to three feet of breathing room on all sides.
During roofing work, debris becomes a bigger concern. Falling shingles and loose fasteners from a roofing contractor can dent coil fins or puncture refrigerant lines. A simple plywood barrier placed a few feet away can deflect most falling material without blocking airflow entirely.
A few protective measures worth implementing:
- Turn off the HVAC system during heavy debris work
- Cover the top loosely with breathable protective material (never airtight plastic while running)
- Inspect coil fins daily during exterior renovations
After the project ends, have the condenser coils cleaned and inspected. Even minor fin compression reduces efficiency and strains the compressor over time.
Manage Dust With Negative Air Pressure and Filtration
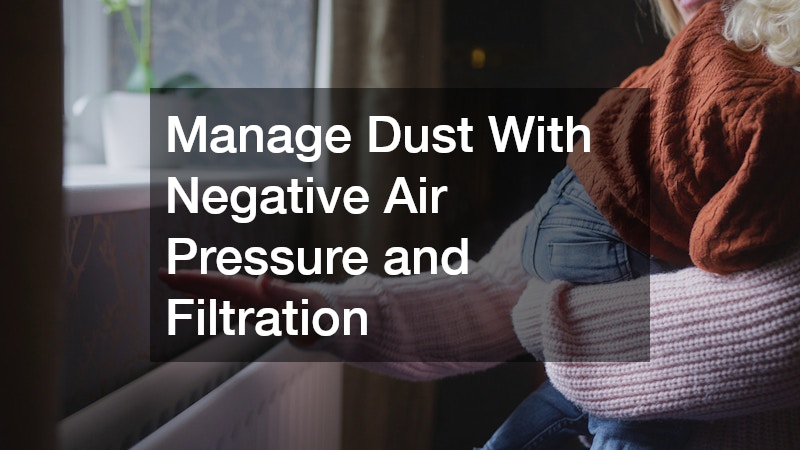
Some renovations generate more dust than simple vent sealing can handle. In those cases, airflow strategy matters.
Professional construction teams often use negative air machines to pull contaminated air out of work zones rather than letting it drift into the rest of the structure. This strategy prevents dust from being drawn into return ducts.
If you’re performing major interior remodeling, consult climate control services about temporary filtration upgrades. Switching to a higher-MERV filter during construction can capture finer particles. Just be sure your system can handle the increased resistance without reducing airflow.
In projects requiring permit adjustments—such as moving duct lines or altering ventilation—working with a permit expediter can help ensure that temporary modifications remain compliant. Mechanical codes exist for safety and airflow balance, and even short-term changes can create long-term problems if improperly executed.
During active construction:
- Replace filters weekly
- Keep thermostats set to ”off” when heavy sanding or cutting occurs
- Avoid running the system continuously during demolition
Dust control is not glamorous, but it is one of the most impactful protective steps you can take.
Protect HVAC During Window and Envelope Upgrades
Upgrading a building’s exterior shell changes how it breathes. Installing replacement windows, sealing gaps, or improving insulation can dramatically alter airflow patterns.
Before window installation begins, power down the HVAC system. Window removal creates a sudden influx of outdoor air and dust. Running the system during that time can pull debris into return vents.
After envelope improvements, test system balance. Tighter buildings trap conditioned air more effectively—but they also reveal pre-existing airflow issues. Rooms that were once drafty may now feel stuffy. Humidity levels may shift.
If roof repairs are part of the renovation, attic ventilation must also be evaluated. Blocked soffit vents or improperly sealed penetrations can impact system efficiency and moisture management.
Post-project, consider scheduling:
- Static pressure testing
- Airflow balancing
- Humidity evaluation
Envelope upgrades improve efficiency—but only if your HVAC system adapts correctly.
Safeguard HVAC Equipment in Shared or Adjacent Spaces
Not all HVAC components are conveniently located. Some systems share space with storage areas or fuel equipment, increasing their vulnerability during renovation.
If air handlers or duct runs are located near a storage unit—whether attached or detached—construction dust can migrate through shared framing cavities. Seal these connections carefully.
Similarly, if a propane storage tank sits near mechanical equipment, maintain safe clearance during renovation staging. Materials stacked too close can restrict ventilation or create fire risk.
When protecting systems in mixed-use spaces:
- Shield exposed wiring from accidental impact
- Protect refrigerant lines from bending or compression
- Avoid stacking tools or debris against air handlers
Mechanical rooms often become temporary storage areas during renovations. Resist that temptation. HVAC equipment needs space to operate safely and efficiently.
Prevent Vibration Damage During Structural Changes
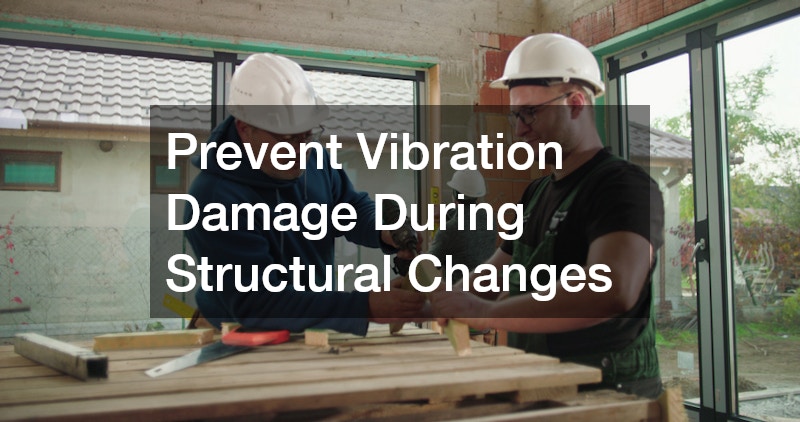
Heavy demolition, framing adjustments, and excavation create vibration that travels farther than you might expect. While HVAC systems aren’t delicate, they are calibrated machines with precise connections.
If a local builder is performing structural changes, ensure vibration-sensitive components are considered. Refrigerant line sets running through walls can loosen at connection points. Mounting brackets for air handlers may shift subtly.
Outdoor excavation—especially during hardscaping—also poses risk. If a patio installer is digging near refrigerant lines or electrical conduits, confirm exact line locations before trenching begins.
To minimize vibration-related damage:
- Install vibration isolation pads under condensers
- Inspect line insulation after demolition
- Tighten mounting hardware post-project
Sometimes damage isn’t immediately obvious. Weeks later, a faint refrigerant leak may surface. A proactive inspection after major structural work can catch issues before they escalate.
Coordinate HVAC Safety During Roof and Structural Work
Roof-level work often intersects directly with HVAC infrastructure. Exhaust vents, flue pipes, and sometimes entire units are mounted above.
Because these components penetrate the roofing surface, they are especially vulnerable during tear-offs and replacements. Crews moving quickly may step around vent stacks, temporarily detach flashing, or shift components slightly to install new materials. Even careful teams can unintentionally alter alignment when removing old shingles or underlayment.
Mark and Protect Ventilation Components Early
Before work begins, confirm that vent stacks are clearly marked. During tear-offs, they can be jostled or temporarily removed. Misalignment can lead to leaks or improper ventilation.
Marking penetrations with visible paint or flags helps roofing crews quickly identify sensitive areas. It’s also wise to photograph vent positioning before work starts. That way, you can compare alignment afterward.
Pay particular attention to:
- Furnace exhaust terminations
- Bathroom and kitchen ventilation ducts
- Intake vents for high-efficiency systems
Improper reconnection can reduce draft performance or allow moisture intrusion around penetrations.
Streamline Inspections and Code Compliance
If your project involves permits for structural modification, involving a permit expediter can simplify mechanical inspections tied to those changes. Building officials often review roof penetrations and ventilation paths.
Changes to rooflines, added dormers, or structural reinforcements may require updated ventilation layouts. Coordinating documentation in advance prevents delays and ensures that HVAC penetrations remain compliant with local codes.
Monitor Protection During Active Roofing
During active roof work:
- Cover rooftop units securely
- Verify flashing around penetrations after shingle replacement
- Inspect exhaust alignment before interior ceilings are closed
Make sure coverings are secured but breathable. Trapping moisture under airtight tarps can cause condensation buildup inside rooftop equipment.
After shingles are replaced, inspect flashing carefully. Improperly sealed penetrations can allow slow leaks that damage insulation or ceilings weeks later.
A minor oversight at roof level can cascade into moisture damage, airflow problems, or backdrafting. Mechanical coordination should never be an afterthought.
Maintain Proper Airflow During Landscaping and Exterior Improvements
Exterior upgrades often seem unrelated to HVAC systems—until airflow suffers.
New plantings, fencing, or hardscaping can unintentionally crowd outdoor units. Landscaping projects involving large deliveries from tree nurseries sometimes result in temporary soil piles near condensers. Fine dust from those materials can clog coils.
Similarly, if a patio installer adjusts grading levels, ensure the condenser pad remains level and elevated above potential water runoff.
A quick airflow checklist for exterior projects:
- Maintain at least 24-36 inches of clearance
- Trim shrubs regularly
- Avoid decorative enclosures that trap heat
- Confirm drainage slopes away from equipment
After landscaping is complete, visually inspect the unit during peak operation. Listen for unusual strain or overheating. Airflow restriction often manifests as longer run times or uneven cooling indoors.
Plan for HVAC System Testing Before Project Completion
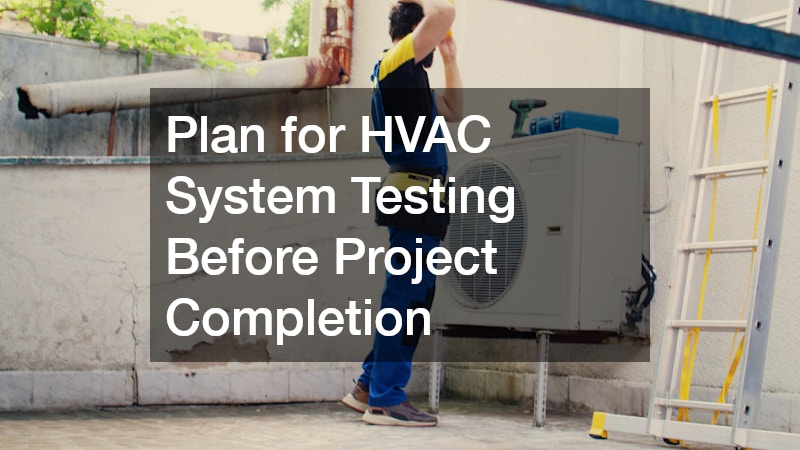
As renovation wraps up, don’t assume your HVAC system automatically returned to normal operation.
Schedule a professional performance test before signing off on the project. Climate control services can verify temperature differential, refrigerant charge, and airflow balance.
If replacement windows were installed, reassess humidity control and thermostat calibration. Tighter building envelopes often require small adjustments in system cycling or ventilation strategy.
Ask your technician to:
- Check duct leakage
- Confirm blower performance
- Recalibrate programmable thermostats
- Document post-renovation efficiency readings
Think of this as the commissioning phase of your renovation. Just as electrical systems are tested, HVAC deserves the same verification.
Perform Post-Renovation Deep Cleaning and Maintenance
Even with careful protection, some dust infiltration is inevitable. The final step is restoration and prevention.
Fine drywall particles, sawdust, insulation fibers, and debris from demolition are incredibly light. They linger in the air longer than you expect and often settle inside return ducts, blower compartments, and coil fins. Even if vents were sealed and the system was shut off during heavy construction, microscopic particles can still make their way inside.
Instead of assuming everything is fine because the renovation is complete, treat the end of construction as the beginning of a recovery phase for your HVAC system.
Start With Immediate Filter Replacement
Replace all air filters immediately.
Do not wait until the next scheduled change. During renovation, filters capture far more particulate matter than they are designed for under normal living conditions. Even if the filter ”looks fine” at a glance, it may already be partially clogged.
A restricted filter forces your system to work harder, increasing:
- Blower motor strain
- Energy consumption
- Uneven airflow throughout the home
After replacing the filter, check it again within a few weeks. In many cases, a second replacement is necessary shortly after construction due to residual airborne dust continuing to circulate.
Clean Coils and Inspect Blower Components
Clean condenser coils and inspect blower components.
Outdoor coils are especially vulnerable during renovation. Even light debris buildup reduces heat transfer efficiency. When coils can’t release heat effectively, the compressor runs longer and experiences greater wear.
Inside the air handler, the blower assembly should be inspected for:
- Dust accumulation on fan blades
- Debris inside the housing
- Clogged drain pans
- Signs of moisture buildup
Dust on blower blades reduces balance and airflow efficiency. Over time, that imbalance can create vibration and noise that wasn’t present before renovation.
If cleaning is beyond basic homeowner maintenance, schedule a professional service visit. A thorough post-renovation cleaning can restore performance and prevent long-term efficiency loss.
Check Attic Ductwork and Insulation Integrity
If any work occurred near attic ductwork during roof repairs, verify insulation remains intact and undisturbed.
Attics are common staging areas during construction. Workers moving across joists may inadvertently compress duct insulation or shift flexible duct runs. Even slight compression reduces thermal efficiency and can cause conditioned air to lose temperature before reaching living spaces.
Visually inspect for:
- Detached duct connections
- Torn insulation sleeves
- Crushed flex ducts
- Displaced vapor barriers
Also confirm that attic ventilation pathways remain clear. Blocked vents can increase heat buildup, forcing your HVAC system to work harder during cooling seasons.
Inspect Adjacent and Shared Mechanical Spaces
If your property includes a detached storage unit connected by shared mechanical pathways, inspect that space as well. Renovation dust can travel farther than expected.
Air movement between structures—especially if they share duct runs or utility chases—can carry fine particles beyond the primary work zone. Storage spaces often go unchecked, allowing dust to settle around mechanical equipment unnoticed.
In these areas:
- Check for dust accumulation near vents or returns
- Ensure nothing was stacked against mechanical lines
- Confirm access panels remain securely closed
Overlooking secondary spaces is a common mistake that leads to delayed airflow or efficiency problems weeks after a renovation appears finished.
Complete a Comprehensive System Review
A final maintenance checklist should include:
- Full system cleaning
- Coil inspection
- Electrical connection tightening
- Refrigerant pressure verification
Electrical connections deserve particular attention. Construction vibration can loosen terminals or shift wiring slightly. Even small connection issues can cause intermittent operation or system shutdowns.
Refrigerant pressure verification ensures that line sets were not accidentally kinked, punctured, or stressed during renovation. Catching minor pressure inconsistencies early prevents larger compressor failures later.
Reset and Recommit to Routine Maintenance
Once everything is cleaned and confirmed, reset your regular maintenance schedule.
Renovations disrupt normal timelines. Filters may have been changed early. Service visits may have been delayed. Use the end of construction as a clean reset point.
Mark the date of your post-renovation service and plan forward:
- Schedule seasonal inspections
- Set filter change reminders
- Monitor energy bills for unusual spikes
The goal is not only to restore performance but to ensure your HVAC system transitions smoothly from construction recovery back to long-term reliability.
A thoughtful cleanup phase protects the investment you made—not just in your renovation, but in the comfort and efficiency of your home.
Renovating Without Sacrificing HVAC Performance
Renovations bring transformation—but they also bring risk. HVAC systems are often invisible until something goes wrong, which is why they’re so easily overlooked during construction.
Protecting your heating and cooling system requires coordination, foresight, and follow-through. It means thinking beyond drywall and finishes to consider airflow, vibration, contamination, and mechanical integrity.
When properly protected, your HVAC system will continue operating efficiently long after the dust settles. And instead of facing unexpected repair bills, you’ll enjoy the full benefits of your renovation—comfort included.
Renovations are exciting. Whether you’re opening up a floor plan, replacing aging materials, or modernizing a property for better efficiency, construction signals progress. But behind the drywall dust and power tools, there’s a vulnerable system quietly at risk: your HVAC.
Heating and cooling systems are designed for controlled environments. Renovations, on the other hand, create chaos—dust, vibration, airflow disruptions, exposed wiring, structural shifts, and debris. Even small projects can introduce contaminants into ductwork or damage sensitive components. Larger remodels can throw off airflow balance entirely.
Protecting your HVAC system during renovations isn’t just about avoiding repair costs. It’s about preserving indoor air quality, maintaining energy efficiency, and preventing long-term mechanical strain. The steps you take before and during construction will determine whether your system keeps running smoothly—or becomes an expensive afterthought.
Below is a comprehensive guide to doing it right.
Inspect and Document Your HVAC System Before Work Begins
Before the first wall is opened or tool is powered on, pause and evaluate your current HVAC condition. Renovations complicate liability. If something stops working midway through a project, you’ll want clear documentation of its prior state.
This isn’t about assuming something will go wrong. It’s about removing ambiguity. Construction sites are busy environments with multiple trades moving quickly. If airflow weakens or the system starts short-cycling during the project, you need to know whether that issue existed beforehand or developed during renovation.
A clear mechanical baseline gives you confidence—and leverage if needed.
Schedule a Comprehensive Professional Inspection
Start with a professional inspection. Have a technician examine:
- The air handler and blower motor
- Refrigerant lines and insulation
- Electrical connections
- Ductwork in attics or crawlspaces
- Outdoor condenser condition
Ask the technician to go beyond a quick visual check. This is the time to identify small concerns that could worsen under construction stress. For example:
- Slightly worn insulation around refrigerant lines can tear easily during framing work.
- Minor duct sagging in an attic may become worse if workers step near it.
- A blower motor already accumulating dust will struggle even more during renovation.
If possible, request performance readings during this visit. Knowing the system’s temperature split (the difference between return and supply air) provides a valuable reference point later.
This inspection also allows you to address small maintenance issues before renovation begins. It’s far easier to replace a weak capacitor or secure loose wiring before crews are working around the equipment.
Document Everything Visually
Take timestamped photos of visible components. Focus on areas most likely to be affected:
- Condenser coil condition
- Line set routing
- Attic duct connections
- Vent terminations at the roofline
- Thermostat wiring
Photographs serve two purposes. First, they help you remember exactly how everything looked before walls were opened. Second, they eliminate guesswork if a dispute arises.
If you’re working with a local builder, ask them to walk through the property and identify areas where mechanical systems intersect with construction zones. This might include:
- Framing adjustments near duct chases
- Wall removal around return air paths
- Flooring changes that affect vent placement
That shared understanding prevents confusion later. When everyone sees where the HVAC components run, they’re less likely to accidentally cut into or compress them.
Coordinate Early When Roof Access Is Involved
If roof access will be required, coordinate early with the roofing contractor. Vents, flues, and exhaust terminations can be bumped, shifted, or temporarily removed during work. Even minor displacement can lead to leaks or airflow inefficiencies.
Ask specific questions before work begins:
- Will any vent stacks be removed or temporarily capped?
- How will penetrations be protected during tear-off?
- Who is responsible for verifying proper reinstallation?
Even a small shift in an exhaust vent can affect draft performance. Improper sealing around penetrations may introduce moisture that damages insulation or nearby ductwork.
Clear coordination here prevents callbacks later when ceilings are already closed.
Build an Accountability Checklist You Can Reference
Create a simple accountability checklist:
- System performance baseline (temperature differential)
- Static pressure reading if available
- Filter condition
- Thermostat functionality
Keep this checklist accessible throughout the project. If a room suddenly feels warmer or airflow seems weaker, revisit your baseline numbers.
For example:
- If the temperature differential drops significantly, dust buildup or duct disconnection could be the cause.
- If static pressure increases, something may be blocking airflow.
- If thermostat programming resets, wiring may have been disturbed.
The goal isn’t to micromanage the construction process—it’s to have objective reference points.
Protecting Your Future Self From Uncertainty
Think of this stage as protecting your future self. If something changes, you’ll know whether it was aging equipment—or construction impact.
Without documentation, even honest contractors may struggle to determine responsibility. With documentation, conversations become straightforward. You have proof of system condition, performance, and configuration before renovation began.
That clarity reduces stress, prevents finger-pointing, and ensures your HVAC system remains an asset—not an afterthought—throughout the renovation process.
Seal and Isolate Ductwork to Prevent Contamination
Renovation dust is relentless. It floats, settles, and infiltrates places you didn’t think possible. Once it enters ductwork, it can circulate for months.
The goal here is containment.
Seal all supply and return vents with plastic sheeting secured tightly with painter’s tape. This should be done before demolition begins. If duct sections are being modified or temporarily disconnected during roof repairs, ensure open ends are capped immediately.
In homes near landscaping projects or areas with heavy organic debris—such as properties adjacent to tree nurseries—airborne particles can increase significantly when exterior work overlaps with interior renovations. Fine pollen and soil dust combine with drywall debris to create a perfect storm inside duct systems.
Consider isolating work zones using temporary plastic barriers. If only part of the home is under renovation, keep HVAC airflow restricted away from active construction areas.
After work concludes, schedule a duct inspection. Even well-sealed systems can experience minor contamination, and it’s far easier to address it immediately than months later when airflow problems surface.
Protect Outdoor Units From Construction Debris
Outdoor condensers are surprisingly easy to damage during renovations. They sit exposed, often near work zones, and are vulnerable to falling debris, nails, sawdust, and foot traffic.
If you’re adding hardscaping or outdoor features, coordinate placement carefully. A patio installer might temporarily stack materials near the unit without realizing the airflow clearance requirements. Condensers need at least two to three feet of breathing room on all sides.
During roofing work, debris becomes a bigger concern. Falling shingles and loose fasteners from a roofing contractor can dent coil fins or puncture refrigerant lines. A simple plywood barrier placed a few feet away can deflect most falling material without blocking airflow entirely.
A few protective measures worth implementing:
- Turn off the HVAC system during heavy debris work
- Cover the top loosely with breathable protective material (never airtight plastic while running)
- Inspect coil fins daily during exterior renovations
After the project ends, have the condenser coils cleaned and inspected. Even minor fin compression reduces efficiency and strains the compressor over time.
Manage Dust With Negative Air Pressure and Filtration
Some renovations generate more dust than simple vent sealing can handle. In those cases, airflow strategy matters.
Professional construction teams often use negative air machines to pull contaminated air out of work zones rather than letting it drift into the rest of the structure. This strategy prevents dust from being drawn into return ducts.
If you’re performing major interior remodeling, consult climate control services about temporary filtration upgrades. Switching to a higher-MERV filter during construction can capture finer particles. Just be sure your system can handle the increased resistance without reducing airflow.
In projects requiring permit adjustments—such as moving duct lines or altering ventilation—working with a permit expediter can help ensure that temporary modifications remain compliant. Mechanical codes exist for safety and airflow balance, and even short-term changes can create long-term problems if improperly executed.
During active construction:
- Replace filters weekly
- Keep thermostats set to ”off” when heavy sanding or cutting occurs
- Avoid running the system continuously during demolition
Dust control is not glamorous, but it is one of the most impactful protective steps you can take.
Protect HVAC During Window and Envelope Upgrades
Upgrading a building’s exterior shell changes how it breathes. Installing replacement windows, sealing gaps, or improving insulation can dramatically alter airflow patterns.
Before window installation begins, power down the HVAC system. Window removal creates a sudden influx of outdoor air and dust. Running the system during that time can pull debris into return vents.
After envelope improvements, test system balance. Tighter buildings trap conditioned air more effectively—but they also reveal pre-existing airflow issues. Rooms that were once drafty may now feel stuffy. Humidity levels may shift.
If roof repairs are part of the renovation, attic ventilation must also be evaluated. Blocked soffit vents or improperly sealed penetrations can impact system efficiency and moisture management.
Post-project, consider scheduling:
- Static pressure testing
- Airflow balancing
- Humidity evaluation
Envelope upgrades improve efficiency—but only if your HVAC system adapts correctly.
Safeguard HVAC Equipment in Shared or Adjacent Spaces
Not all HVAC components are conveniently located. Some systems share space with storage areas or fuel equipment, increasing their vulnerability during renovation.
If air handlers or duct runs are located near a storage unit—whether attached or detached—construction dust can migrate through shared framing cavities. Seal these connections carefully.
Similarly, if a propane storage tank sits near mechanical equipment, maintain safe clearance during renovation staging. Materials stacked too close can restrict ventilation or create fire risk.
When protecting systems in mixed-use spaces:
- Shield exposed wiring from accidental impact
- Protect refrigerant lines from bending or compression
- Avoid stacking tools or debris against air handlers
Mechanical rooms often become temporary storage areas during renovations. Resist that temptation. HVAC equipment needs space to operate safely and efficiently.
Prevent Vibration Damage During Structural Changes
Heavy demolition, framing adjustments, and excavation create vibration that travels farther than you might expect. While HVAC systems aren’t delicate, they are calibrated machines with precise connections.
If a local builder is performing structural changes, ensure vibration-sensitive components are considered. Refrigerant line sets running through walls can loosen at connection points. Mounting brackets for air handlers may shift subtly.
Outdoor excavation—especially during hardscaping—also poses risk. If a patio installer is digging near refrigerant lines or electrical conduits, confirm exact line locations before trenching begins.
To minimize vibration-related damage:
- Install vibration isolation pads under condensers
- Inspect line insulation after demolition
- Tighten mounting hardware post-project
Sometimes damage isn’t immediately obvious. Weeks later, a faint refrigerant leak may surface. A proactive inspection after major structural work can catch issues before they escalate.
Coordinate HVAC Safety During Roof and Structural Work
Roof-level work often intersects directly with HVAC infrastructure. Exhaust vents, flue pipes, and sometimes entire units are mounted above.
Because these components penetrate the roofing surface, they are especially vulnerable during tear-offs and replacements. Crews moving quickly may step around vent stacks, temporarily detach flashing, or shift components slightly to install new materials. Even careful teams can unintentionally alter alignment when removing old shingles or underlayment.
Mark and Protect Ventilation Components Early
Before work begins, confirm that vent stacks are clearly marked. During tear-offs, they can be jostled or temporarily removed. Misalignment can lead to leaks or improper ventilation.
Marking penetrations with visible paint or flags helps roofing crews quickly identify sensitive areas. It’s also wise to photograph vent positioning before work starts. That way, you can compare alignment afterward.
Pay particular attention to:
- Furnace exhaust terminations
- Bathroom and kitchen ventilation ducts
- Intake vents for high-efficiency systems
Improper reconnection can reduce draft performance or allow moisture intrusion around penetrations.
Streamline Inspections and Code Compliance
If your project involves permits for structural modification, involving a permit expediter can simplify mechanical inspections tied to those changes. Building officials often review roof penetrations and ventilation paths.
Changes to rooflines, added dormers, or structural reinforcements may require updated ventilation layouts. Coordinating documentation in advance prevents delays and ensures that HVAC penetrations remain compliant with local codes.
Monitor Protection During Active Roofing
During active roof work:
- Cover rooftop units securely
- Verify flashing around penetrations after shingle replacement
- Inspect exhaust alignment before interior ceilings are closed
Make sure coverings are secured but breathable. Trapping moisture under airtight tarps can cause condensation buildup inside rooftop equipment.
After shingles are replaced, inspect flashing carefully. Improperly sealed penetrations can allow slow leaks that damage insulation or ceilings weeks later.
A minor oversight at roof level can cascade into moisture damage, airflow problems, or backdrafting. Mechanical coordination should never be an afterthought.
Maintain Proper Airflow During Landscaping and Exterior Improvements
Exterior upgrades often seem unrelated to HVAC systems—until airflow suffers.
New plantings, fencing, or hardscaping can unintentionally crowd outdoor units. Landscaping projects involving large deliveries from tree nurseries sometimes result in temporary soil piles near condensers. Fine dust from those materials can clog coils.
Similarly, if a patio installer adjusts grading levels, ensure the condenser pad remains level and elevated above potential water runoff.
A quick airflow checklist for exterior projects:
- Maintain at least 24-36 inches of clearance
- Trim shrubs regularly
- Avoid decorative enclosures that trap heat
- Confirm drainage slopes away from equipment
After landscaping is complete, visually inspect the unit during peak operation. Listen for unusual strain or overheating. Airflow restriction often manifests as longer run times or uneven cooling indoors.
Plan for HVAC System Testing Before Project Completion
As renovation wraps up, don’t assume your HVAC system automatically returned to normal operation.
Schedule a professional performance test before signing off on the project. Climate control services can verify temperature differential, refrigerant charge, and airflow balance.
If replacement windows were installed, reassess humidity control and thermostat calibration. Tighter building envelopes often require small adjustments in system cycling or ventilation strategy.
Ask your technician to:
- Check duct leakage
- Confirm blower performance
- Recalibrate programmable thermostats
- Document post-renovation efficiency readings
Think of this as the commissioning phase of your renovation. Just as electrical systems are tested, HVAC deserves the same verification.
Perform Post-Renovation Deep Cleaning and Maintenance
Even with careful protection, some dust infiltration is inevitable. The final step is restoration and prevention.
Fine drywall particles, sawdust, insulation fibers, and debris from demolition are incredibly light. They linger in the air longer than you expect and often settle inside return ducts, blower compartments, and coil fins. Even if vents were sealed and the system was shut off during heavy construction, microscopic particles can still make their way inside.
Instead of assuming everything is fine because the renovation is complete, treat the end of construction as the beginning of a recovery phase for your HVAC system.
Start With Immediate Filter Replacement
Replace all air filters immediately.
Do not wait until the next scheduled change. During renovation, filters capture far more particulate matter than they are designed for under normal living conditions. Even if the filter ”looks fine” at a glance, it may already be partially clogged.
A restricted filter forces your system to work harder, increasing:
- Blower motor strain
- Energy consumption
- Uneven airflow throughout the home
After replacing the filter, check it again within a few weeks. In many cases, a second replacement is necessary shortly after construction due to residual airborne dust continuing to circulate.
Clean Coils and Inspect Blower Components
Clean condenser coils and inspect blower components.
Outdoor coils are especially vulnerable during renovation. Even light debris buildup reduces heat transfer efficiency. When coils can’t release heat effectively, the compressor runs longer and experiences greater wear.
Inside the air handler, the blower assembly should be inspected for:
- Dust accumulation on fan blades
- Debris inside the housing
- Clogged drain pans
- Signs of moisture buildup
Dust on blower blades reduces balance and airflow efficiency. Over time, that imbalance can create vibration and noise that wasn’t present before renovation.
If cleaning is beyond basic homeowner maintenance, schedule a professional service visit. A thorough post-renovation cleaning can restore performance and prevent long-term efficiency loss.
Check Attic Ductwork and Insulation Integrity
If any work occurred near attic ductwork during roof repairs, verify insulation remains intact and undisturbed.
Attics are common staging areas during construction. Workers moving across joists may inadvertently compress duct insulation or shift flexible duct runs. Even slight compression reduces thermal efficiency and can cause conditioned air to lose temperature before reaching living spaces.
Visually inspect for:
- Detached duct connections
- Torn insulation sleeves
- Crushed flex ducts
- Displaced vapor barriers
Also confirm that attic ventilation pathways remain clear. Blocked vents can increase heat buildup, forcing your HVAC system to work harder during cooling seasons.
Inspect Adjacent and Shared Mechanical Spaces
If your property includes a detached storage unit connected by shared mechanical pathways, inspect that space as well. Renovation dust can travel farther than expected.
Air movement between structures—especially if they share duct runs or utility chases—can carry fine particles beyond the primary work zone. Storage spaces often go unchecked, allowing dust to settle around mechanical equipment unnoticed.
In these areas:
- Check for dust accumulation near vents or returns
- Ensure nothing was stacked against mechanical lines
- Confirm access panels remain securely closed
Overlooking secondary spaces is a common mistake that leads to delayed airflow or efficiency problems weeks after a renovation appears finished.
Complete a Comprehensive System Review
A final maintenance checklist should include:
- Full system cleaning
- Coil inspection
- Electrical connection tightening
- Refrigerant pressure verification
Electrical connections deserve particular attention. Construction vibration can loosen terminals or shift wiring slightly. Even small connection issues can cause intermittent operation or system shutdowns.
Refrigerant pressure verification ensures that line sets were not accidentally kinked, punctured, or stressed during renovation. Catching minor pressure inconsistencies early prevents larger compressor failures later.
Reset and Recommit to Routine Maintenance
Once everything is cleaned and confirmed, reset your regular maintenance schedule.
Renovations disrupt normal timelines. Filters may have been changed early. Service visits may have been delayed. Use the end of construction as a clean reset point.
Mark the date of your post-renovation service and plan forward:
- Schedule seasonal inspections
- Set filter change reminders
- Monitor energy bills for unusual spikes
The goal is not only to restore performance but to ensure your HVAC system transitions smoothly from construction recovery back to long-term reliability.
A thoughtful cleanup phase protects the investment you made—not just in your renovation, but in the comfort and efficiency of your home.
Renovating Without Sacrificing HVAC Performance
Renovations bring transformation—but they also bring risk. HVAC systems are often invisible until something goes wrong, which is why they’re so easily overlooked during construction.
Protecting your heating and cooling system requires coordination, foresight, and follow-through. It means thinking beyond drywall and finishes to consider airflow, vibration, contamination, and mechanical integrity.
When properly protected, your HVAC system will continue operating efficiently long after the dust settles. And instead of facing unexpected repair bills, you’ll enjoy the full benefits of your renovation—comfort included.